The first step is to install the required package. You can use Synaptic Package Manager or just command line:
sudo apt-get install ejabberd
During the installation a new user, ejabberd, will be created in the system. This is the user the server will be running on. When installation is finished ejabberd server is started. To configure the server you need to stop it
sudo /etc/init.d/ejabberd stop
Next step is to configure administrator and hosts. Open /etc/ejabberd/ejabberd.cfg file for edit and make the following change
%% Admin user
{acl, admin, {user, "andrey", "jabber.ndpar.com"}}.
%% Hostname
{hosts, ["localhost", "ubuntu", "jabber.ndpar.com"]}.
For admin you need to specify the user name and domain name that you want to use as a Jabber ID. By default it's localhost and it's functional but it's better to change it to something meaningful. The list of hostnames is tricky. In theory you can provide there just localhost but in practice it didn't work for me. After digging into some Erlang exceptions I got while registering admin account (see next step) I came to conclusion that in the list of hostnames there must be a short hostname of the box. You can get it by running hostname -s command (in my case it was "ubuntu"). In addition you can provide other hostnames you like, but the short one is mandatory.
When you are done with editing, start the server
sudo /etc/init.d/ejabberd start
Now it's time to register the admin user we configured on the previous step. Run the following command replacing password placeholders with the actual password and providing user name and domain name from ejabberd.cfg file
sudo ejabberdctl register andrey jabber.ndpar.com xxxxxx
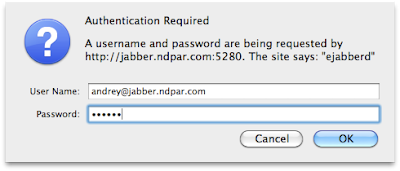
That's it! You have now working XMPP server with one registered user. To verify that everything is ok, in your browser go to the admin page of the server (http://jabber.ndpar.com:5280/admin) and check the statistics. You'll be asked to type your JID and password, so use the information you entered on the previous step

As a note, I didn't create my own SSL certificate because for isolated intranet the default one is quite enough. If you are not comfortable with that feel free to create a new certificate following the steps from the original article.
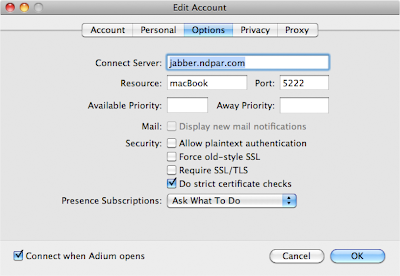
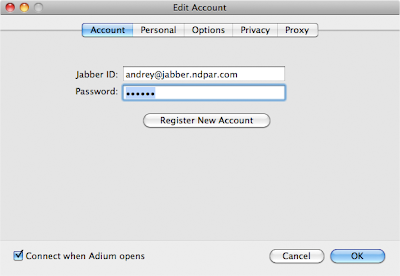
Now you are ready to add newly created account to your Jabber client. In Adium, for example, go to File -> Add Acount -> Jabber and provide server hostname/IP, JID and password.


Click OK button, accept security certificate permanently and go online.
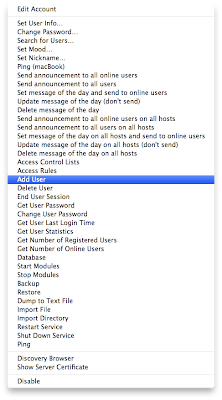
Now, to really enjoy IM you need more users on your server. The best part here is that you can create new users just from your Jabber client. You can actually do many things from the client, and you don't need to ssh to the remote server and run command for that. Just go to File -> your ejabberd account, and chose whatever you need from the menu

Pretty cool, eh — client and admin tool in one place.
